How do you restore items from the SharePoint recycling bin in a filtered manner?

Imagine this: You've just completed the migration of a team within an organisation to a brand new SharePoint site. The transition has been smooth, and now they have access to all their data, with permissions already set up and ready to go. As a new user of SharePoint, your initial tasks are straightforward: find your files and set them up to be synchronised with File Explorer.
However, the first day of a SharePoint migration can be chaotic, with numerous decisions needing to be made all leading up to the go-live. Not to mention the fine line of balancing the project's technical and human aspects.
The art of using File Explorer and SharePoint together
One of the most prominent challenges organisations face when moving data from an old-world file server into a modern SharePoint Online deployment is the end-user reliance on Windows File Explorer. It's a great tool but presents a challenge as SharePoint is generally an online first tool.
Microsoft provides the OneDrive sync client to enable the desktop experiences and, in many cases, easy access to application-specific content. It comes with its challenges and limitations - this blog article will focus on how easy it can be to delete large files and how to get them back afterwards.
Accidentally deleting masses of files... it happens!
It sounds obvious when end-users sync a folder or whole document library in SharePoint to the File Explorer experience. Still, what they do and how they work in this area will directly affect others.
Suppose you have a folder with 10,000 items and decide to move this whole folder to another location. In that case, you must synchronise all the changes associated with your local copy and everyone else's. If all users were in a single office space, you could imagine the wireless access points getting hot 🔥!
And on the flip side, what if someone decides they don't need the documents synced locally anymore? If you are in the know, head over to the OneDrive sync client and choose to remove the location from your local settings and wait for the changes. Then you can delete without impacting anyone else - ideal! You would be surprised, however, by the number of times people will just hit delete and need help understanding they are removing these files for everyone else.
The restoration task begins.
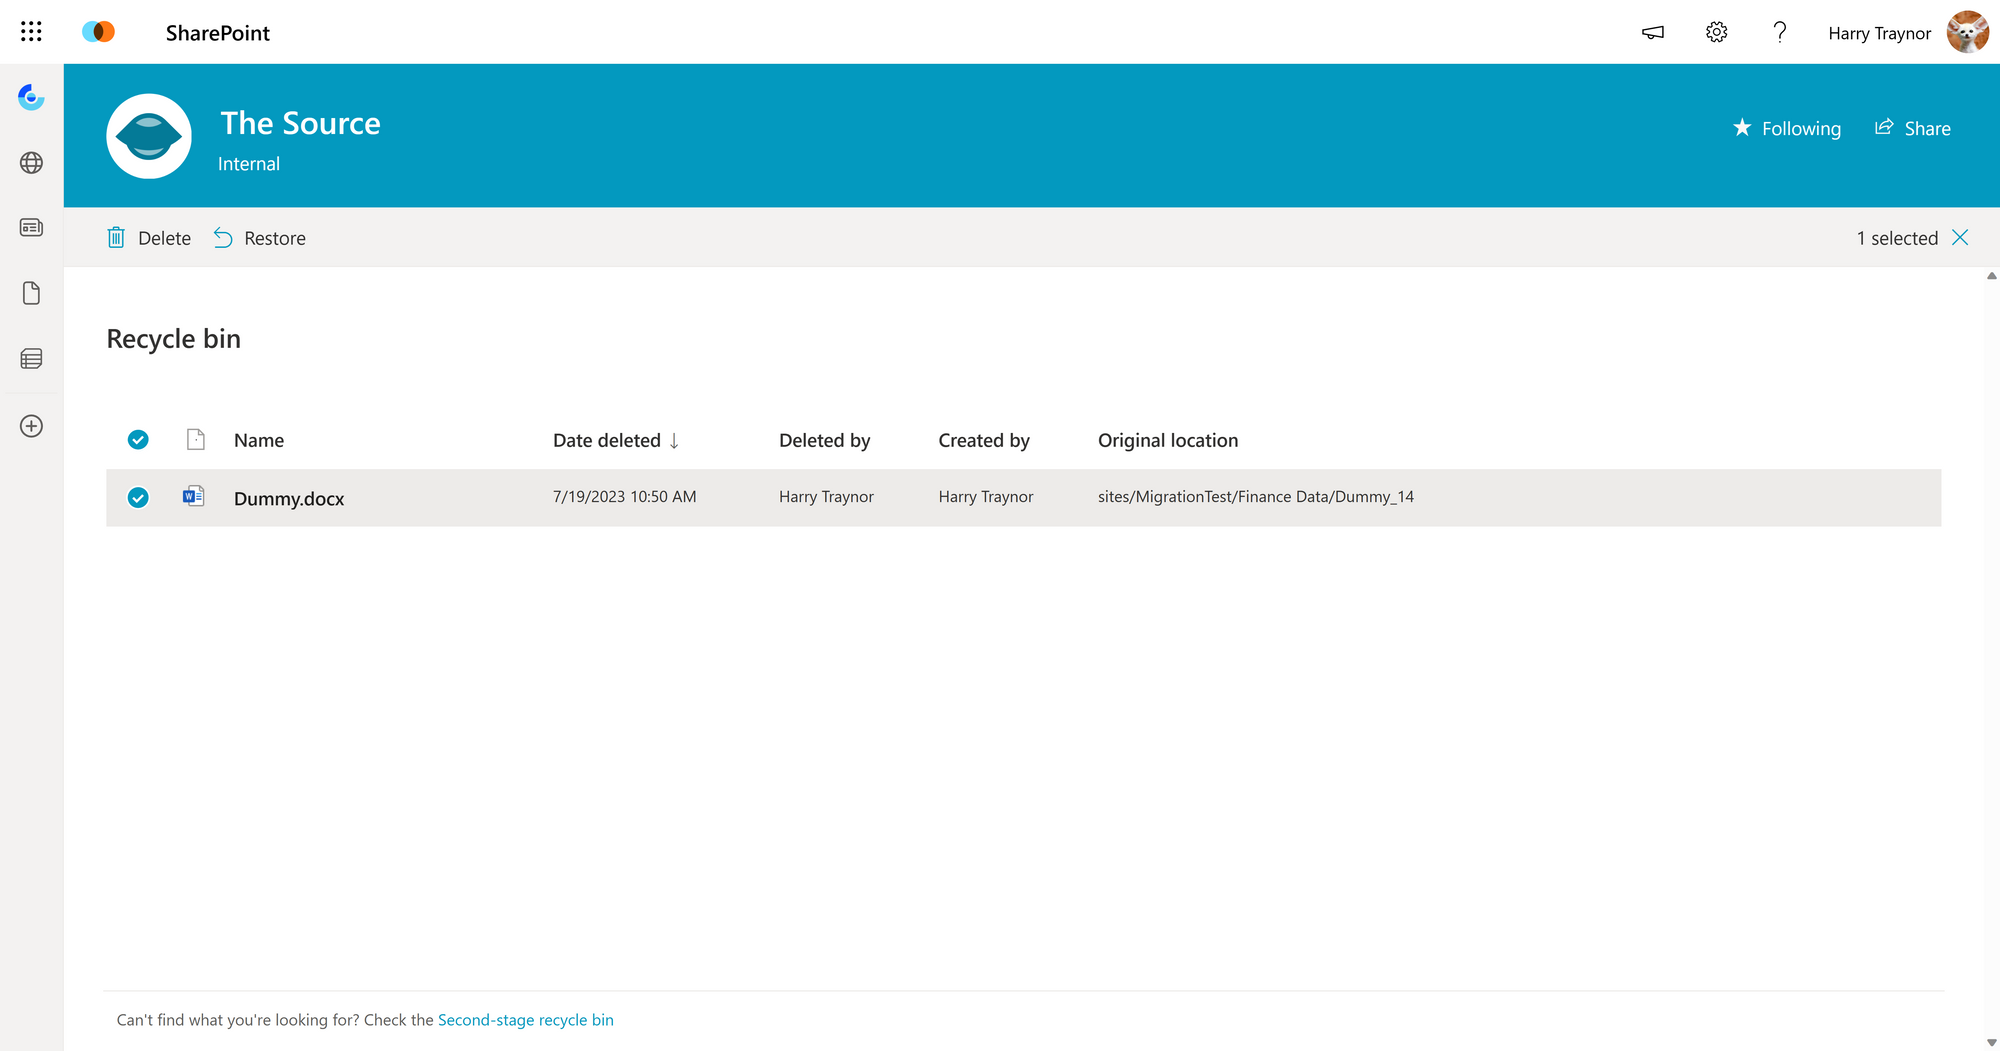
When a mass deletion happens, the files will go straight to the recycling bin (unless you have retention policies or labels configured). Luckily this handy place can restore files after events like this happen.
Option 1: Restore manually from the recycling bin
When in doubt, using the recycling bin directly on a SharePoint site is usually the fastest and most accessible option. However, this requires the user who deleted them to go and find the content and hit restore. This process is ideal for a few items but can quickly become a pain as there are other means to restore large files.

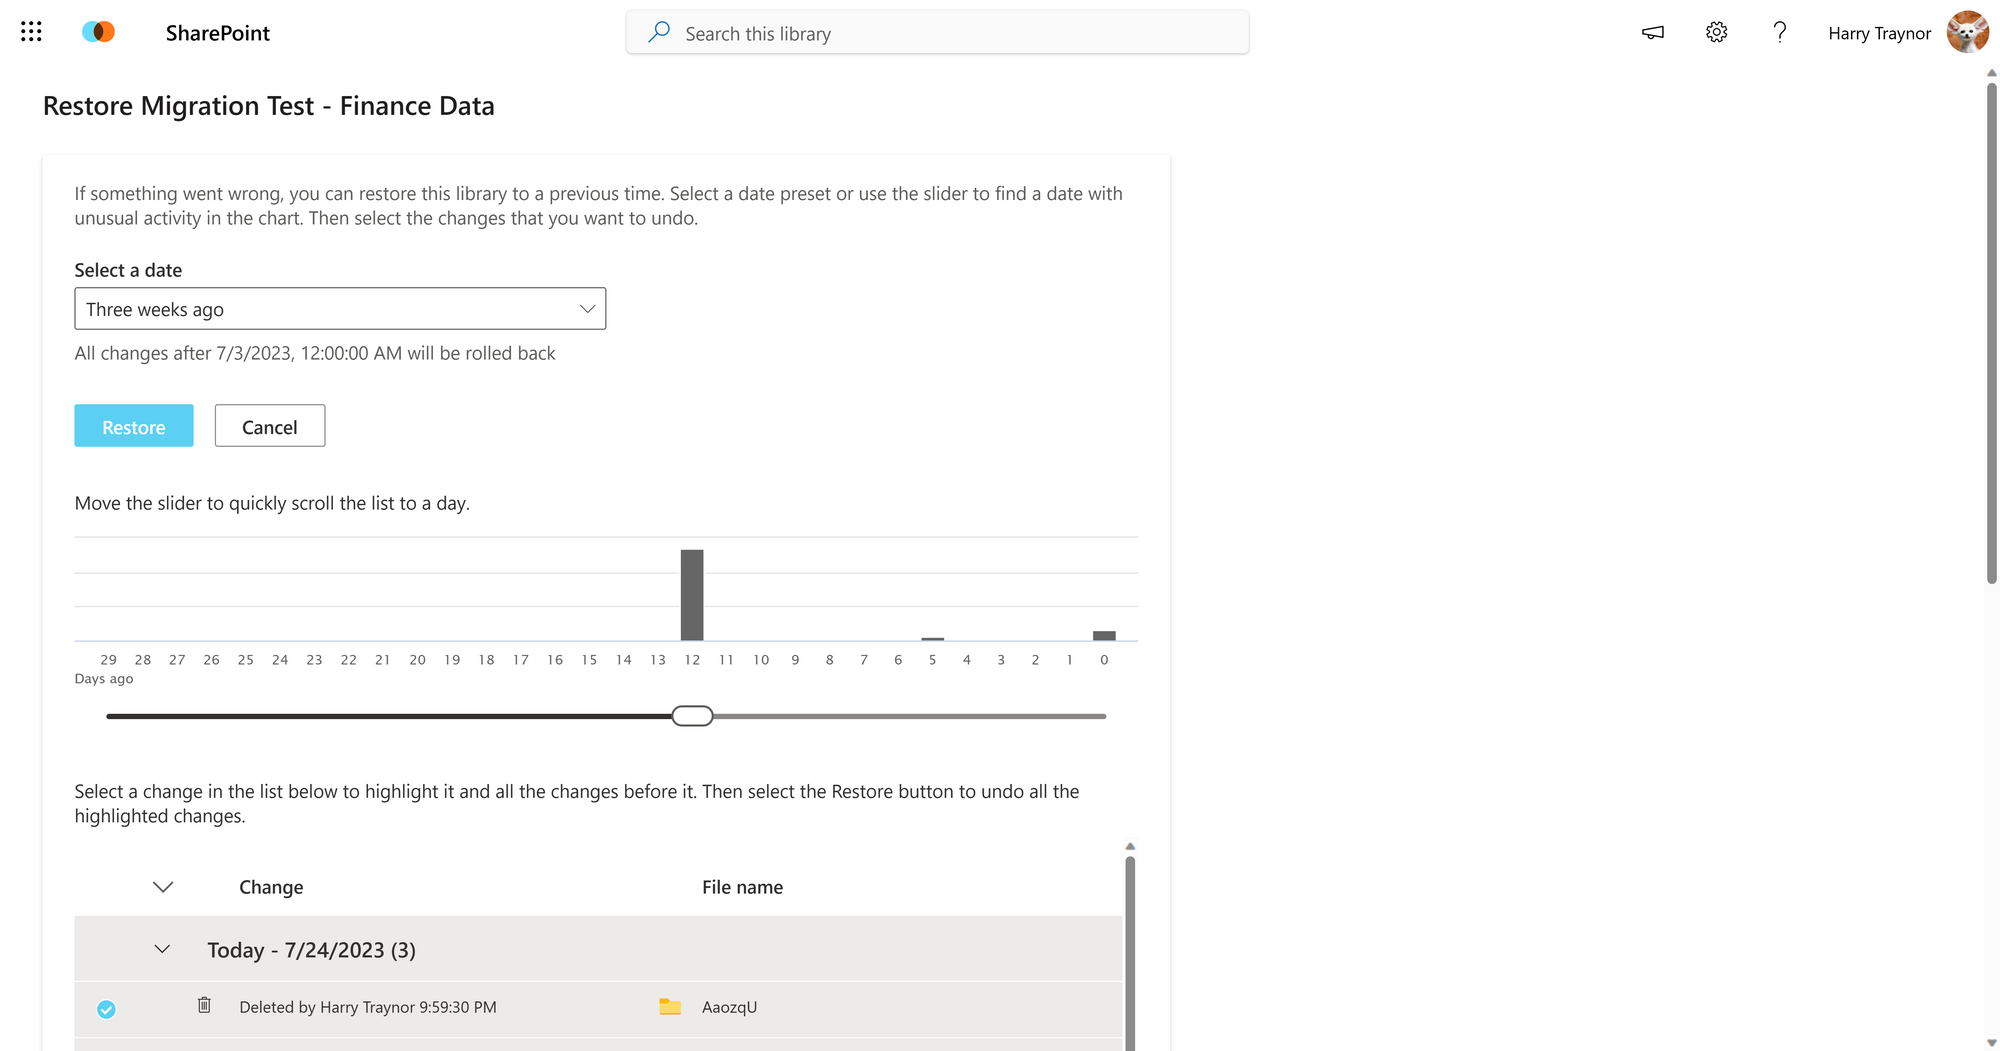
Option 2: Restore in bulk with restore library
If the scale of items deleted is in the thousands, the restore library feature in SharePoint is designed for precisely this moment. Using the recycling bin and file version history, this feature will reset a library to a specific point in time. It also provides insight into the number of files deleted over a range so you can more accurately restore the missing data.
Disclaimer, this will undo all changes made to the library and only allows you to go back 30 days into the past to restore.

Option 3: Restore using PowerShell and the PnP module
The above two options are great but need more control and the ability to filter the restored data easily. If, for example, you wanted to convert only the files that Joe Bloggs deleted from a specific date, you would need more time to be able to with the above two methods (at least you couldn't quickly in an automated manner).
As a result, I wrote the below script that provides some extra functionality when dealing with these situations. Some key considerations I took into account when designing this were the following:
- I must be able to filter the results and restore only items deleted by a particular user.
- I need to be able to set a starting date and several days to recover from. This is important when mass deletion happens slowly with File Explorer and the OneDrive sync.
- It must allow me to restore any conflicted files that might have been recreated since the deletion occurred. For example, renaming a file in the document library so it can be restored correctly.
- It can do a test run and audit how many expected files there are for recovery.
- It must output the results of the restored items to a CSV for further analysis and handover to the affected team.
Restore recycled items PowerShell script
Before trying it live, please test these tools on a dataset you don't care about. The script also processes each item in the recycling bin 1-by-1; if you want to speed up the processes of restoring 100,000's of files quickly, please look into using the SharePoint batching functionality.
Just so you know, the code below shows the script as part of a larger module; you may need to adjust this for your use case.
# Import module locally for development
Import-Module "*.psm1" -ErrorAction Stop

# Connect to SharePoint
$SiteUrl = "https://tenant.sharepoint.com/sites/gtvar"
Connect-PnPOnline -Url $SiteUrl -Interactive

# Restore items from the recycle bin
$Result = Restore-RecycledItems -SiteUrl $SiteUrl -StartDate "2023-05-28" -DaysToRestore 1 -TargetUser "harry@tenant.io" #-WhatIf

# Output the results
If ($Result.RestoredFiles) {
    $Failed = $Result.RestoredFiles.Status | Where-Object { $_ -eq "Failed" }
    Write-Host "Processed: $($Result.RestoredFiles.Count)"
    Write-Host "Renamed: $($Result.RenamedFiles.Count)"
    Write-Host "Failed: $($Failed.Count)"

    # Output restored files to csv
    Export-Csv -Path "D:\RestoredFiles.csv" -InputObject $Result.RestoredFiles -NoTypeInformation
}
Example usage of the PowerShell scriptCSV
<#
.SYNOPSIS
Restores items from the SharePoint recycle bin based on provided parameters.
.DESCRIPTION
The Restore-RecycledItems PowerShell script restores items from the SharePoint recycle bin based on the provided parameters.
The script supports filtering by date range, number of days to restore, and target user.
It also handles restoring files with duplicate names by renaming them automatically.
.PARAMETER SiteUrl
The URL of the SharePoint site where the recycle bin is located.
.PARAMETER StartDate
The starting date (inclusive) for the items to be restored from the recycle bin.
.PARAMETER DaysToRestore
The number of days to restore, counting from the StartDate.
.PARAMETER TargetUser
The email address of the user whose items should be restored. If not specified, items from all users will be restored.
.EXAMPLE
$Result = Restore-RecycledItems -SiteUrl "https://example.sharepoint.com/sites/gtvar" -StartDate "2023-03-31" -DaysToRestore 1 -TargetUser "name@example.io"
Restores items from the recycle bin in the specified SharePoint site that were deleted on 2023-03-31 by the user with the email address specified.
#>

function Restore-RecycledItems {
    [CmdletBinding(SupportsShouldProcess = $True, ConfirmImpact = 'High')]
    param (
        [Parameter(Mandatory = $true)]
        [string]$SiteUrl,

        [Parameter(Mandatory = $true)]
        [DateTime]$StartDate,

        [Parameter(Mandatory = $true)]
        [int]$DaysToRestore,

        [Parameter(Mandatory = $false)]
        [string]$TargetUser
    )

    Begin {
        # Setup vars
        $EndDate = $StartDate.AddDays($DaysToRestore)
        $Result = @{
            RestoredFiles = @()
            RenamedFiles  = @()
        }

        # Attempt to retrieve the recycle bin items
        Try {
            $Recycling = Get-PnPRecycleBinItem |
            Where-Object {
                    ($_.DeletedDate.ToLocalTime() -ge $StartDate) -and
                    ($_.DeletedDate.ToLocalTime() -le $EndDate) -and
                    ($null -eq $TargetUser -or $_.DeletedByEmail -eq $TargetUser)
            }

            # Setup progress vars
            $current = 0
            $total = $Recycling.Count
        }
        Catch {
            New-Warning "Failed to get recycle bin items with error: $($_.Exception.Message)"
            Exit
        }

        # If no items were found, throw an error
        if ($Recycling.Count -eq 0) {
            New-Warning -Message "No items were found between $StartDate - $EndDate"
            Exit
        }
    }

    Process {
        if ($PSCmdlet.ShouldProcess(
            ("{0} item(s) have been found between {1} - {2}, deleted by {3}" -f $Recycling.Count, $StartDate, $EndDate, $TargetUser),
            ("Would you like to restore {0} items(s)?" -f $Recycling.Count),
                "Restore Recycled Items"
            )
        ) {
            New-Message -Message "Starting restore process..."

            # If whatif is not specified, restore the items
            ForEach ($Item in $Recycling) {
                # Setup file vars
                $Dir = $Item.DirName
                $Title = $Item.Title
                $Path = "$Dir/$Title"

                # Show progress with an item name
                $current += 1
                Show-Progress -Current $current -Total $total -ItemName $Title

                if (Get-PnPFile -Url "/$($Path)" -ErrorAction SilentlyContinue) {
                    $FileExists = $true
                    New-Warning -Message "File exists: $Path"
                }
                else {
                    $FileExists = $false
                }

                $RestoreResult = @{
                    Path       = $Path
                    Status     = ""
                    Message    = ""
                    DocumentID = $Item.Id
                }

                if ($FileExists) {
                    # Get the file name and extension
                    $NewFileName = "/$($Path)"
                    $FileName = [System.IO.Path]::GetFileNameWithoutExtension($item.LeafName)
                    $FileExtension = [System.IO.Path]::GetExtension($item.LeafName)

                    # If the file already exists, append a number to the end of the file name
                    $Number = 0
                    while (Get-PnPFile -Url $NewFileName -ErrorAction SilentlyContinue) {
                        $Number++
                        New-Message -Message "Attempting to rename conflict ($Number)"
                        $NewFileName = "/$Dir/${FileName}_${Number}${FileExtension}"
                    }

                    # Rename the file
                    Try {
                        Rename-PnPFile -ServerRelativeUrl "/$($Path)" -TargetFileName "$([System.IO.Path]::GetFileName($NewFileName))" -Force
                        New-Message -Message "Renamed to: $NewFileName"
                        $RenameResult = @{
                            OldPath    = $Path
                            NewPath    = $NewFileName
                            DocumentID = $Item.Id
                        }
                        $Result.RenamedFiles += $RenameResult
                    }
                    Catch {
                        New-Error -Message "Failed to rename: $Title"
                        New-Error -Message "Error: $($_.Exception.Message)"
                        $RestoreResult.Status = "Failed"
                        $RestoreResult.Message = $_.Exception.Message
                        $Result.RestoredFiles += $RestoreResult
                        Continue
                    }
                }

                # Restore the file
                Try {
                    New-Message -Message "Attempting restore: $Title"
                    $Item | Restore-PnpRecycleBinItem -Force
                    $RestoreResult.Status = "Restored"
                    $Result.RestoredFiles += $RestoreResult
                }
                Catch {
                    New-Error -Message "Failed to restore: $Title"
                    New-Error -Message "Error: $($_.Exception.Message)"
                    $RestoreResult.Status = "Failed"
                    $RestoreResult.Message = $_.Exception.Message
                    $Result.RestoredFiles += $RestoreResult
                }
            }

            New-Message -Message "Restore process complete"
        }
    }

    End {
        return $Result
    }

}

Export-ModuleMember -Function Restore-RecycledItems
Core module to restore recycled items with PowerShell
Based on the provided parameters, the Restore-RecycledItems PowerShell script restores items from the SharePoint recycle bin
Output object returned from the script
This is the expected PowerShell object you recieve after running a job.
Name                           Value
----                           -----
RenamedFiles                   {}
RestoredFiles                  {cb7a51fa-9444-4282-b704-1ec80b29a652}
Output of all restored files
If you access the RestoredFiles value within the output, you can find a list of all files that were restored or failed to restore.
Name                           Value
----                           -----
DocumentID                     ac514f74-f927-48ab-8b95-78ea13d54fe7
Path                           sites/gtvar/ah9dk/Document_1.docx
Status                         Restored
DocumentID                     dc8a7072-62ea-4097-8c0e-7d7d7fcd4953
Path                           sites/gtvar/ah9dk/Document.docx
Status                         Restored
Output of all renamed files
Ensuring we communicate to end-users is key when it comes to data, so being able to provide a list of any files that had to be renamed as part of the restore job can be seen below as an example.
Name                           Value
----                           -----
DocumentID                     dc8a7072-62ea-4097-8c0e-7d7d7fcd4953
OldPath                        sites/gtvar/ah9dk/Document.docx
NewPath                        /sites/gtvar/ah9dk/Document_4.docx
Output all files that failed to restore
Name                           Value
----                           -----
DocumentID                     cb7a51fa-9444-4282-b704-1ec80b29a652
Path                           sites/gtvar/ah9dk/Document.docx
Status                         Failed
Message                        The file https://htd3v.sharepoint.com/sites/gtvar/ah9dk/Document.docx is locked for shared use by harry@htdev.io [membership].