
With my passion for technology and experimentation, having a cluster of servers for my home lab projects is only logical. If you're familiar with the r/homelab community on Reddit, you'll understand the slippery slope of buying servers and tech to tinker with. Well, I finally grasped what they meant, and I decided to take the plunge. I purchased a 40 Gigabit Ethernet (40gbe) switch designed explicitly for top-of-rack (TOR) setups in data centres, just for the fun of it and to learn how to use it.
This exciting addition to my home lab opens up a world of possibilities. I'm thrilled to explore its features, understand its inner workings, and discover how it can be effectively employed. It's a chance for hands-on learning and experiencing the latest technology firsthand. So, with enthusiasm and curiosity driving me, I'm ready to embark on this new adventure in my home lab.
My current home lab setup
Before I go into why I purchased the Switch, I'd like to give you a quick overview of my home lab. Within this dynamic environment, I have three servers at my disposal. Two servers are dedicated to computing tasks and equipped with fast attached storage. In contrast, the third server is a dedicated storage unit boasting significant form factor (LFF) drives. It's worth noting that most of the scenarios I experiment with rely on the performance of the attached SSDs, occasionally fetching data over NFS from the robust storage server.
The configuration of these devices undergoes regular changes, allowing me to explore simple clustering setups or delve into more complex storage configurations. Although the data residing on these devices are typically not of utmost importance, I have taken precautions by investing in a sizable 10TB external drive for any critical files or data that requires backup.
To ensure seamless connectivity and management, all of these devices are interconnected using a high-capacity switch, serving as the central hub for general networking, bonding, and managing each device's network interface cards (NICs). This switch operates at a speed of 1 Gigabit Ethernet (1gbe), empowering efficient communication and facilitating the smooth operation of my home lab.
Why the need for 40gbe speeds?
The short answer..., why not! 🤣
But seriously... as I continued working on various projects, I realised that separating storage from computing offered better performance for many of them. This led me to route most data through the network using NFS (Network File System). To achieve this separation, I experimented with different solutions such as GlusterFS, ZFS, and Windows Server Storage Spaces. Considering my heavy Ubuntu environment at the time, I opted for ZFS with NFS to provide efficient storage capabilities.
However, I reached a point where I wanted to take my network-based storage experiments to the next level. I aimed to achieve SSD-level speeds over the network without encountering significant bottlenecks. That's when the idea of incorporating 40 Gigabit Ethernet (40gbe) bandwidth into my home lab emerged. This high-speed capability would enable me to achieve my desired performance, and I even contemplated bonding multiple connections in the future to enhance throughput further. After all, who wouldn't want the remarkable capabilities of 40gbe in their home lab?
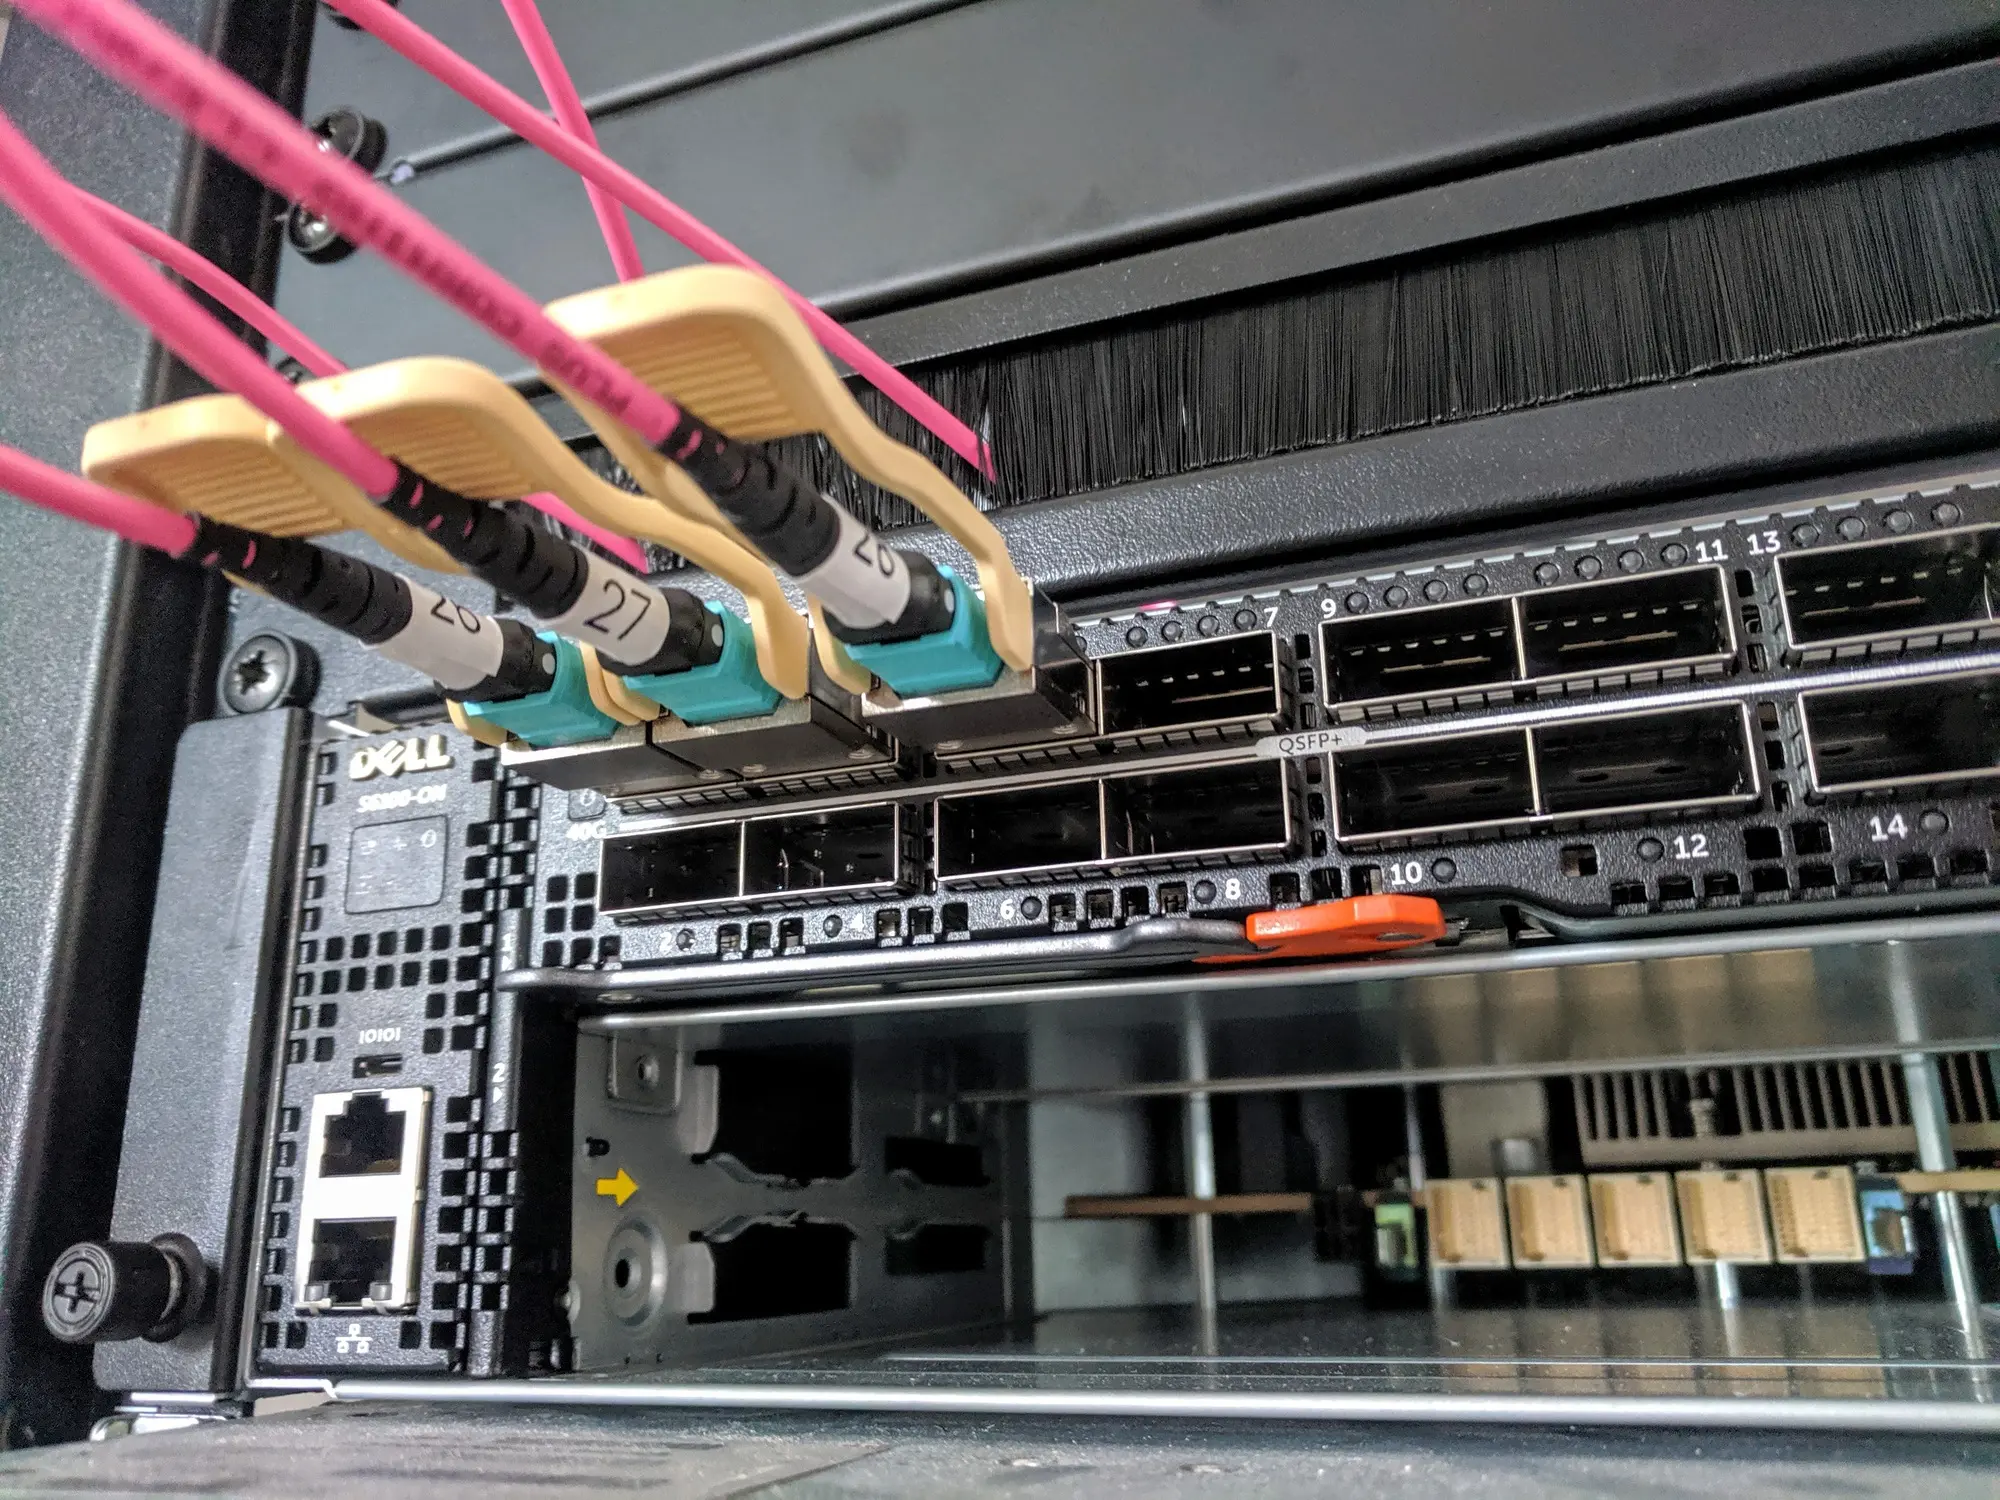
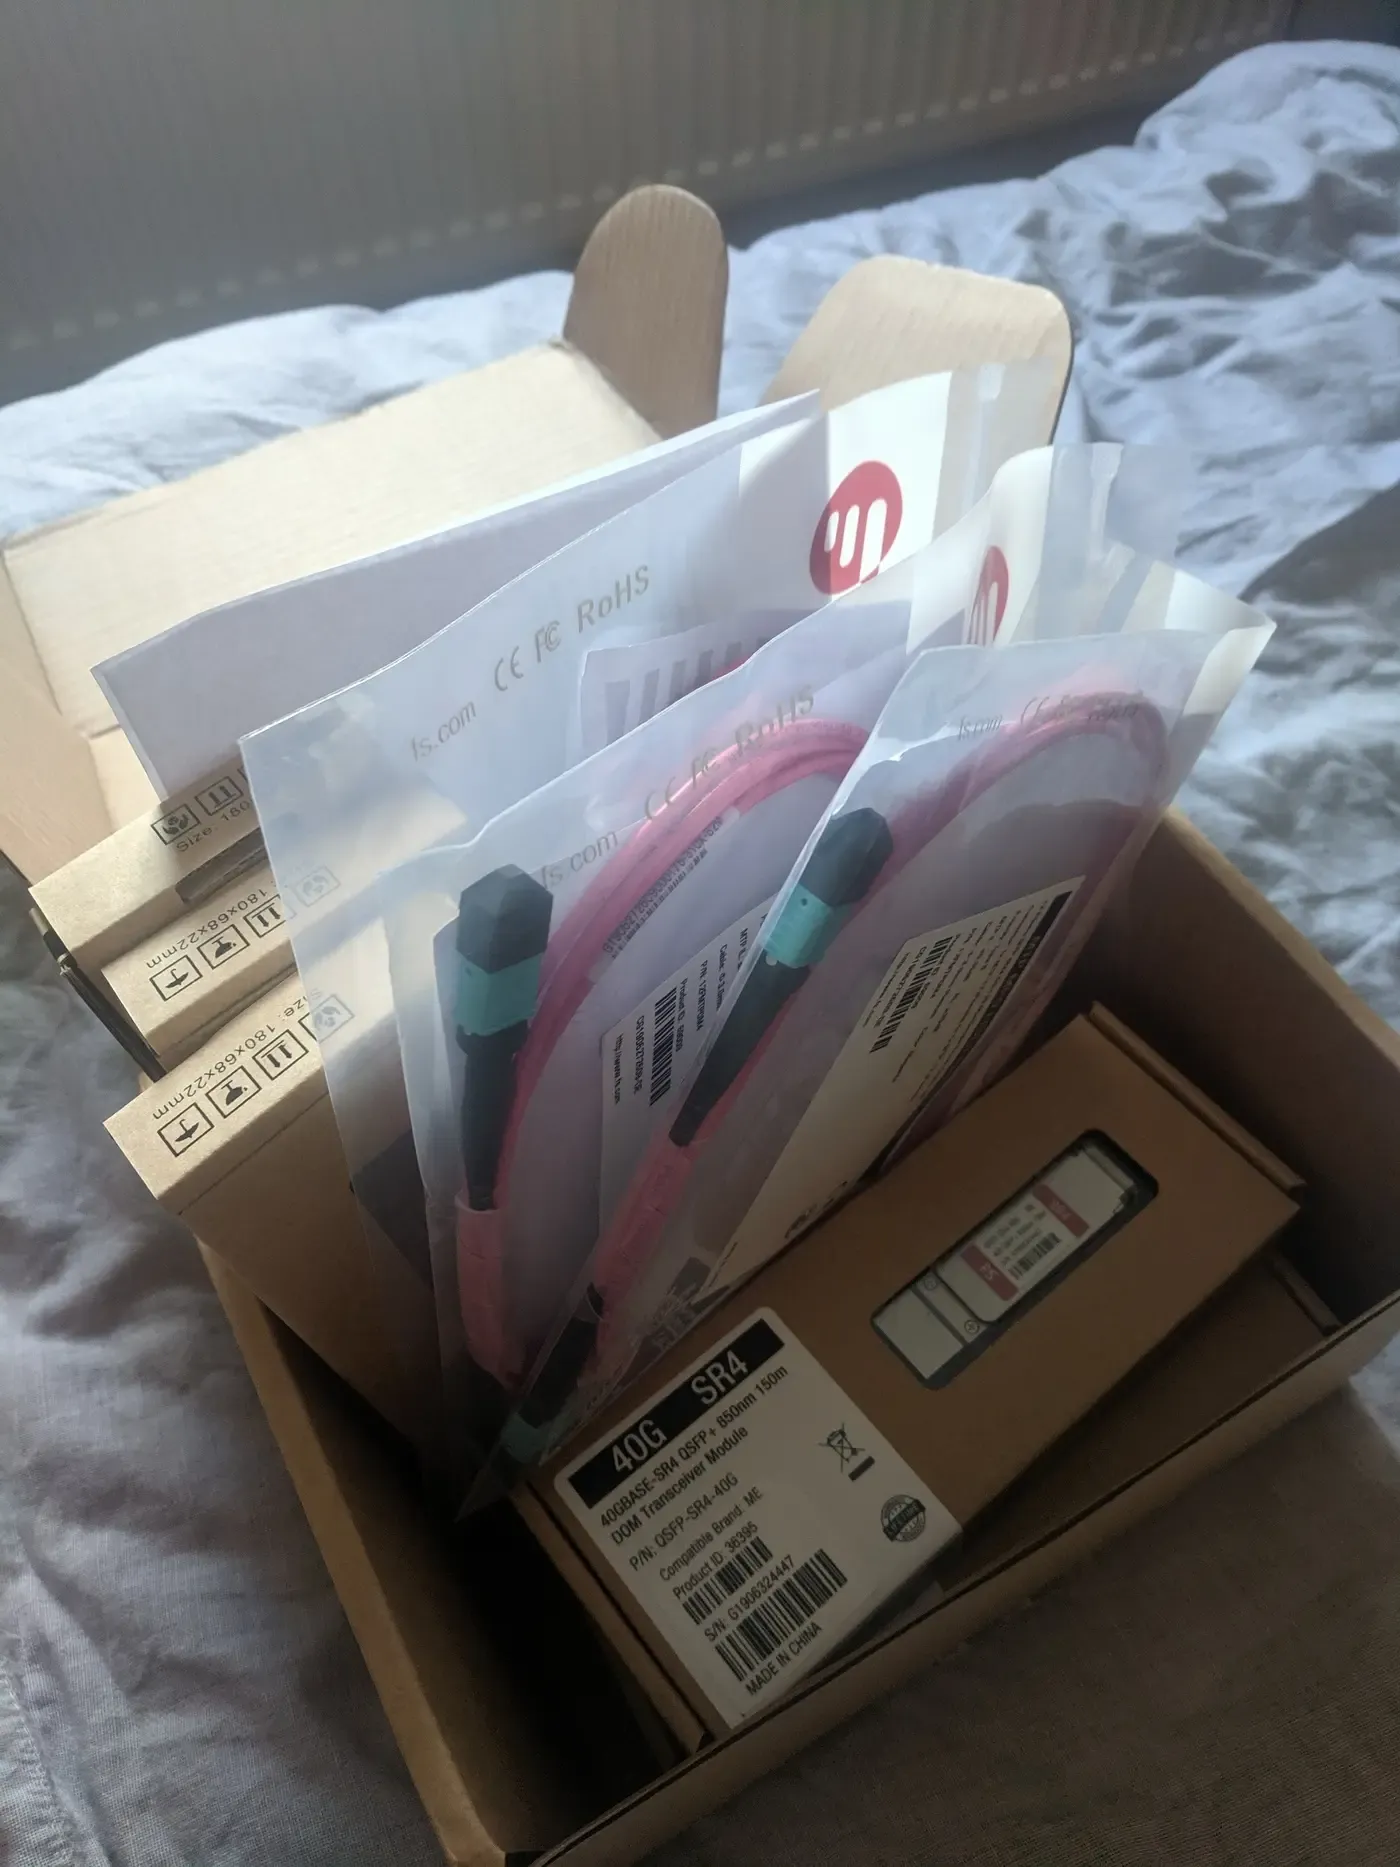
Part list
- Switch Chassis
- Port Module
- Optical Module
- Fiber cables
- Network Interface
Installing the switch
The actual installation of this device is relatively straightforward regarding the physical aspect. Attach the rails to your cab, slide in and fix the switch to the rails, insert the modules you have (in my case, a 16 port 40gbe), insert at least one fibre module, and finally, a fibre cable. You would also want to set up a server with a fibre card and module so we can test the setup.
Connecting to the switch using Telnet
Once you have all the hardware and cable tidying done, you must connect to the switch. There are numerous ways to do this, but on the first setup, you will generally need to connect physically (I still need to get an IP-based connection) - I ended up going for the USB option through a Putty tool. If you are after the official connection steps - see this link from Dell's website.
Funny story - initially, the company I bought this off pinged me back an email after I couldn’t get connected quickly using what Dell’s official docs said. It turns out that when reset, it had been set slightly differently - so I had my switch up and running one RMA later and a few DPD deliveries.

Setting up some basic configuration for the switch
Using CLI on a switch was certainly something new for me - so once looking through all the Dell documentation, I needed clarification and further away from getting my switch functioning. The documentation either missed out on commands that needed to be run before or used controls that didn’t exist. After trawling Reddit and YouTube for a while, I stumbled across a fellow who showed me how to set up a similar model switch and hit gold! See below for a simple login; list all modules, and set them up to function when a fibre cable is connected.
Logging into the switch
First, we must log in to the device and enter the config mode.
en
config
Listing the interfaces the switch has available
Next, we need to check the indexes of our different interfaces and on which modules - there can be quite a few, so make sure you know which one you have plugged in.
show interfacesSelecting an interface to configure
Select the interface you want to manipulate - note here you can edit the RJ45 management port or the modules you have plugged in.
interface ManagementEthernet 1/1
show config

interface fortyGigE 1/1/1
show config
Enabling a port to be used
This command tells the port to become active and allows the fibre connected to function.
no shutdownAssigning an IP to our port
This step is somewhat optional as you don’t need to define the IP of a switch port, but you would need to do this on the management port to allow you to connect remotely using IP.
ip address 10.0.5.20/24I’m sure there will be more parts to this later when I investigate the switch more!